It’s a good idea to set up your margins and bleed properly if you want your book to look great. Without it, you can deal with issues like any unwanted white border around your prints or have a head on a picture cutoff. Thankfully, there are a multitude of methods to achieve this. We have created an easy guide for you to follow so you can add margins and bleed to your own documents for your next book run.
What Is A Bleed?
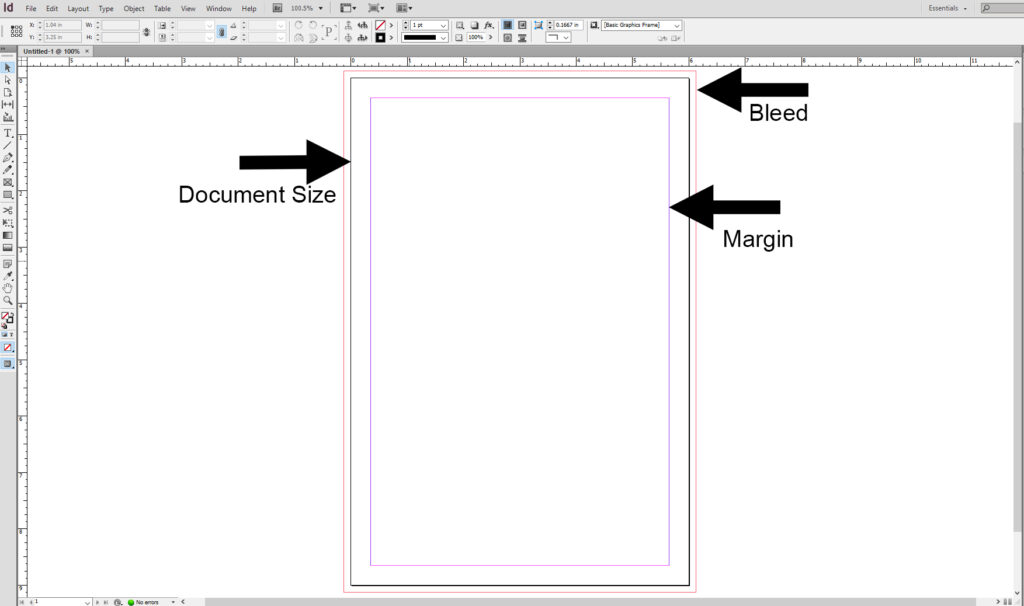
We can define bleed as the area which is extended outside of the regular document size. The reason why bleed exists is because it allows the background colors and images to go to the edge of the page when they are cut, without having to deal with any white spaces.
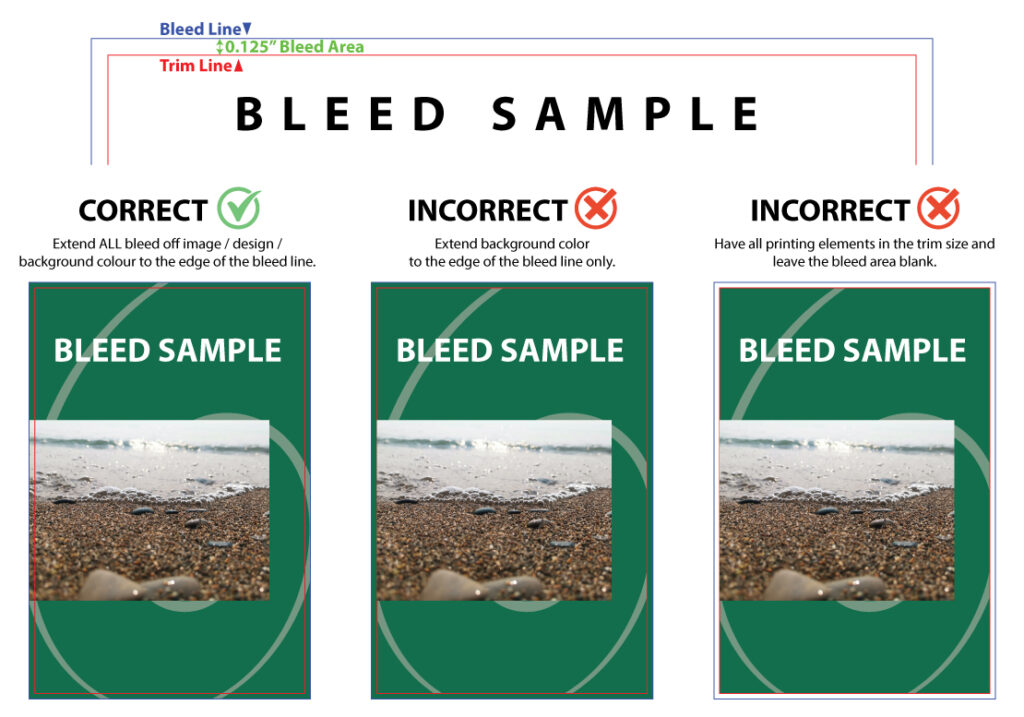
With that in mind, what you need here is around 1/8” or 0.125 inch (or 3mm) on each side of the page.
It is important to know that industrial printers do not print to the edge of the paper, but use a bigger size paper and then trim the surrounding area.
Why Do You Need To Have At Least 1/8” Of Bleed?
You need to ensure the image or color is running off the edge of the paper. Having that additional bleed of 0.125 inch (1/8” or 3mm) or more allows for your document to negate the tolerance that is caused during production such as slight shifting from printing, trimming, and binding. That allows the end results of your design to look professionally done.
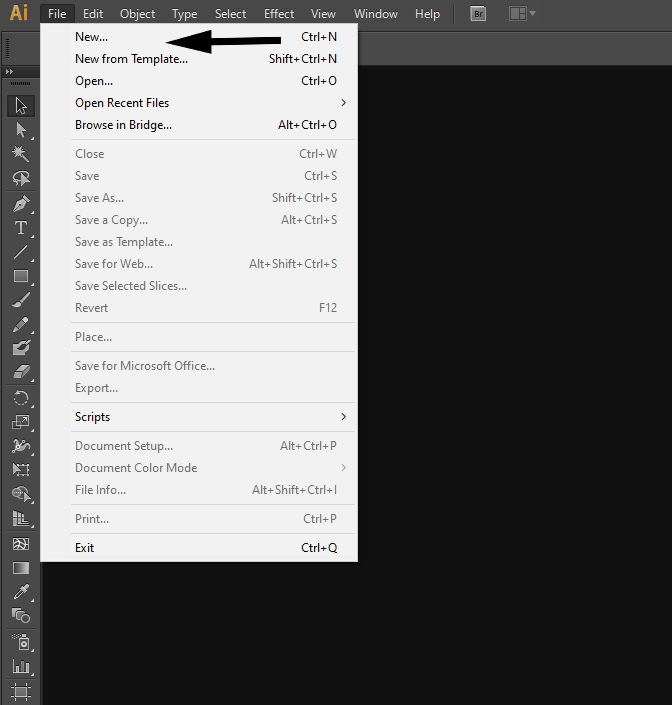
When you are using programs like InDesign or Illustrator, you can set up your own bleed whenever you create a new document. If you use Word, you must create a larger document page size on your own. It’ll cut to the actual size when it gets printed.
On the contrary, if the design of your book doesn’t have any color or graphic runs to the edge of the book, no bleeds are required. However, we do recommend adding a minimum of 0.25 -0.5 inches for margins for text safe area, making sure no texts get cutoff.
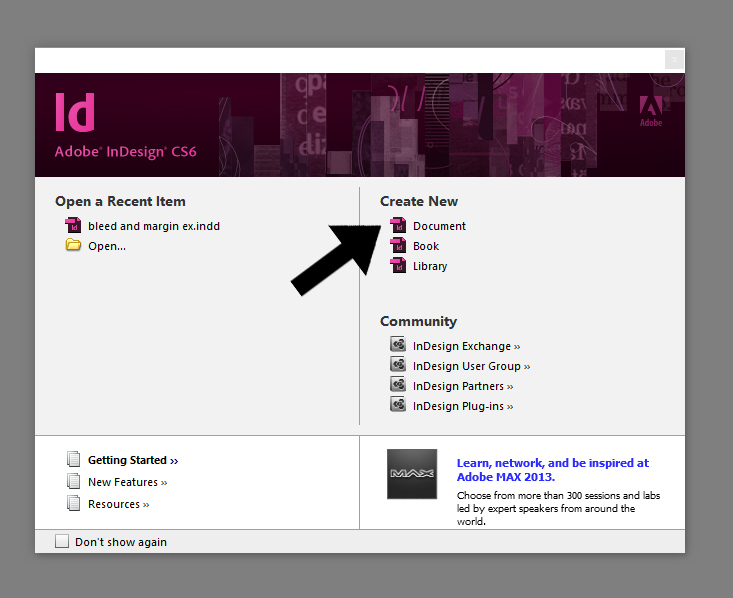
How Can You Set Up The Document Bleeds With Adobe Programs?
Adobe programs are widely known as the most reliable software in the field of graphic design, publishing, and printing. So, it’s easy to understand that they do have options to help you customize bleed in an efficient and powerful manner.
If you use InDesign or Illustrator, we advise you to add the bleed before you create the document!
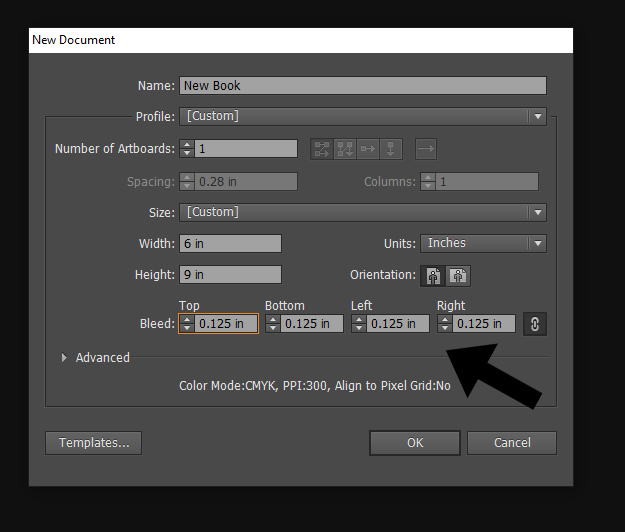
When you open Illustrator, you will find the Bleed setting under the Bleed header whenever you create a new document. Add 0.125 inches of bleed to each side of your page so the printers can cut the appropriate amount for your project.
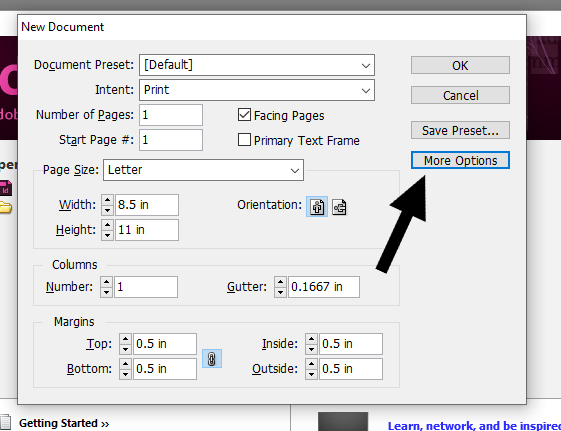
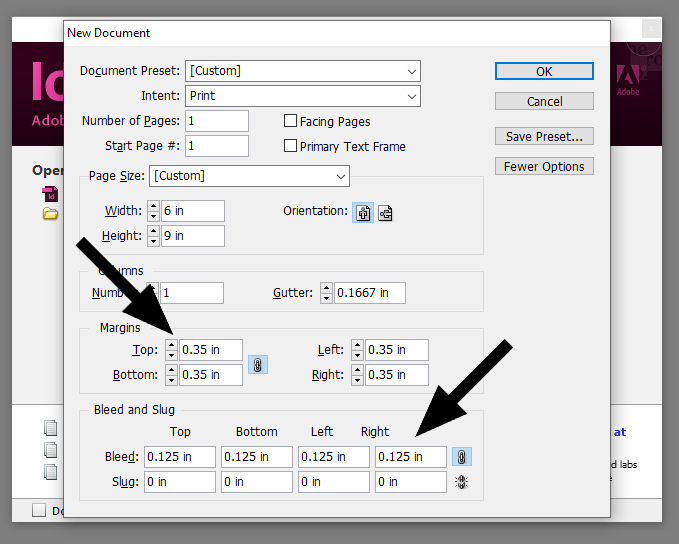
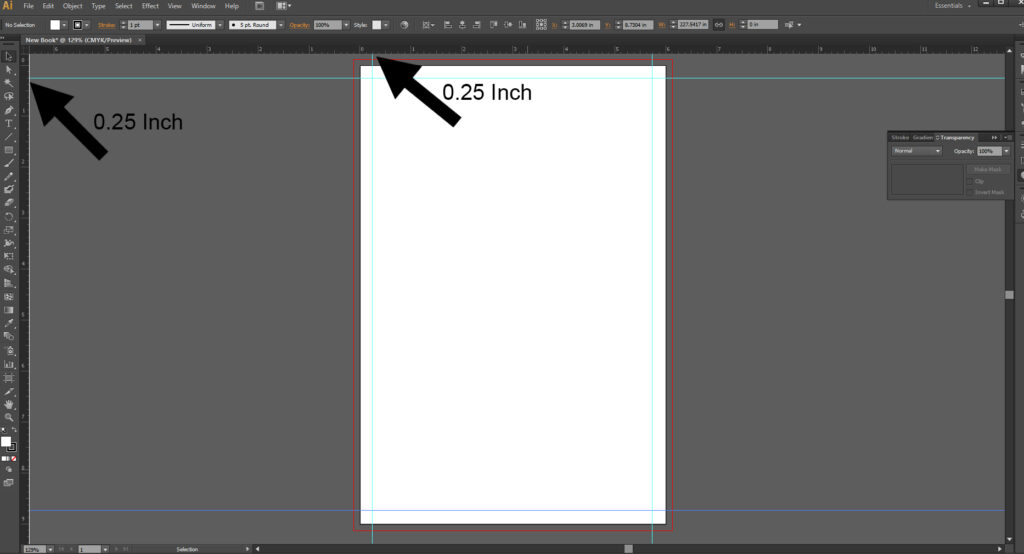
If you use InDesign, then you can find the Bleed settings in the Bleed and Slug drop-down menu. What you can do here is to set the four sides of your pages to 0.125 inch for bleed and 0.35 inch for the margin. Once you do that, you just have to press OK and it will start a new document.
What’s interesting here is that once you open a new document, you will notice there’s a red box outside the page. Adobe software usually uses the red line to show your page bleed.
Adding Margins In Adobe Documents
Extra margins are important because you want to ensure everything looks great and you don’t detract from the look of the document to begin with. Whenever the document is cut, you’ll need to leave any text away from the trimming edge at around 0.25” or more. The margin on the binding edge will need to leave at around 0.5” or more. The reason behind adding those margins is that there are no words or pictures that is too close to the edge and the book will look professionally designed.
To add margins to your file simply click on the ruler marker on the top or side of the document. Click, hold and drag your margin line so that it is at least 0.25 inch. Repeat for all four sides.
InDesign allows you to add a margin whenever you create a document. Of course, you can also feel free to use guides and rulers to mark that area. Remember to have at least a 0.25” margin on the trimming edges and 0.5” margin on the binding edge if possible.
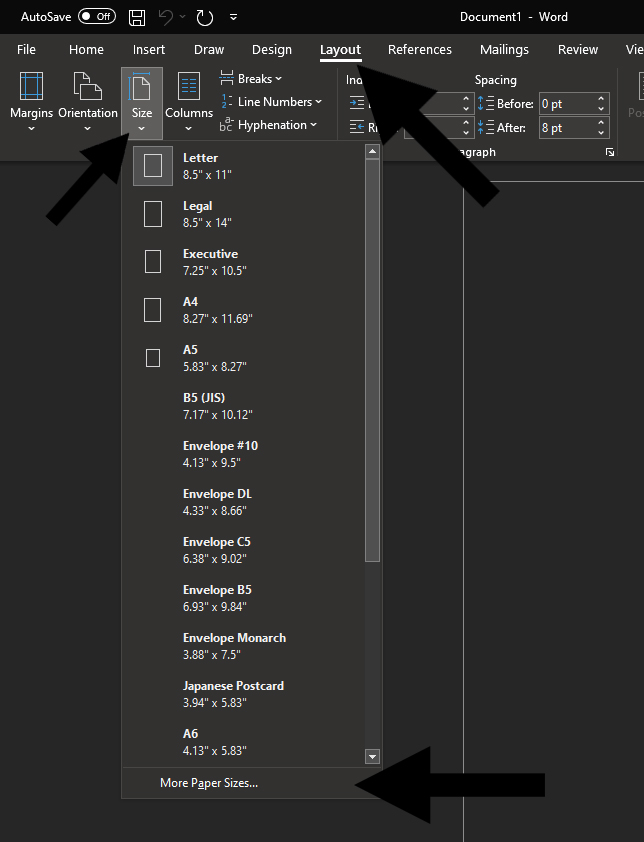
Adding Margins In Microsoft Word
In Microsoft Word, you must adjust the page size so it’s larger by 0.25 inch on each side. Assuming the size of your book is 8.5”w x 11”h, here is what you’ll need to setup:
- Start by creating a blank document
- Now you want to choose the ‘Layout’ tab
- Under the “Size” icon, click on ‘More Paper Sizes’
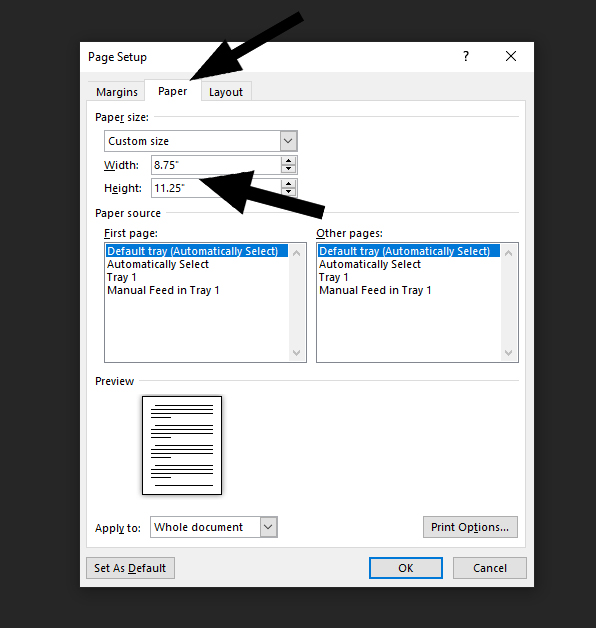
- The Page Setup window will appear, and here you can input the custom sizes
- In this tab you must pick the paper size and then choose a custom size. For example, if the book is 8.5” wide x 11” high, adjust it to the size 8.75”x11.25” by adding the 0.25” margins to the original size.
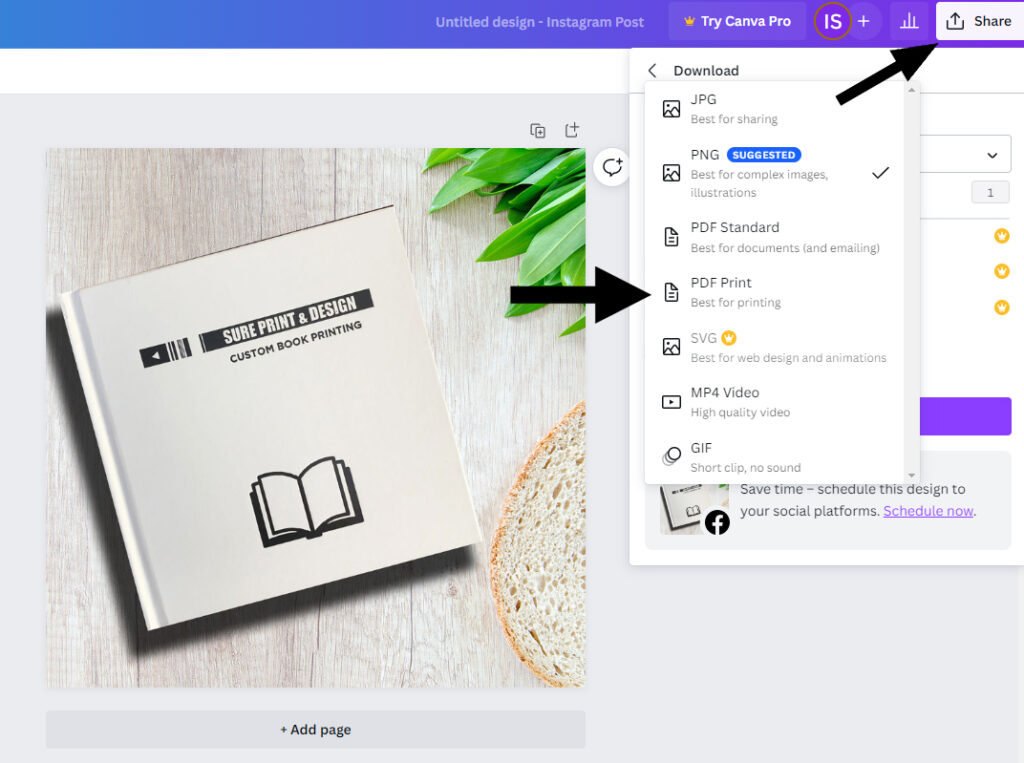
Adding Bleed In Canva
If you want to add margins or bleed to your Canva design, you must drag the backgrounds past the page’s edge. The idea here is that you want to remove the white border. If you are not expanding the design past the document edges, then the white border still appears whenever you are exporting the document with your crop and bleed settings.
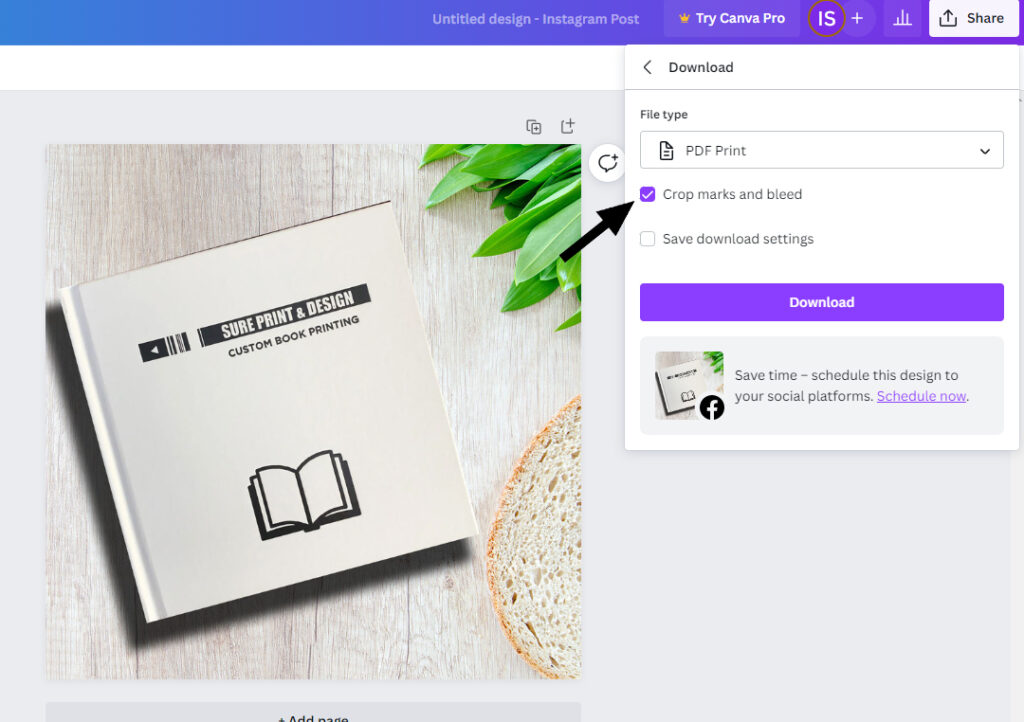
After you check and ensure you make the right changes, then all you must do is to press download, select the PDF print option and then make sure that you check the option “Crop Marks and Bleed”. This will make everything look exactly the way you want, and it will just have the entire process simpler and easier.
Exporting To PDF
At the end of the design, remember to export your file to PDF. PDF’s will avoid any potential font issues and alignment issues with different versions of designing software. What you see is what you’ll get!
Conclusion
As you can see, setting up the documents bleed and margins is simple if you understand the concept. Even if it does take a bit of a trial and error to learn how to set these up based on the software you use, it’s still very much worth the effort. This is a universal requirement for all the book manufacturers. Use that to your own advantage, and rest assured that our graphic designers will ensure your print file is up to spec before sending to production. Just make sure that you take your time and experiment with the right margin and bleed settings, as it will help you to make a professionally designed book!